Attio reinvents the CRM experience with a more flexible, customizable solution catered to teams and startups.
It's a great choice for any collaborative team looking for a more modern solution to boring old enterprise CRMs.
And when combined with Relay.app's automation? To steal a phrase from Attio's website—it's pure "customer relationship magic".
Now let's wave our magic wand and show how you can build your first CRM in Attio—and automate it with Relay.app.
What is Attio?
Attio positions itself as the go-to CRM for modern teams aiming for the market.
What sets it apart is its exceptional adaptability and ease of customization, allowing you to shape your CRM to perfectly match your unique business model.
This flexibility is suitable for a wide range of operations, from high-growth startups to global distributors.
“Attio is an incredibly flexible product, you can build anything on it. It gives you the tools you need to build a CRM that’s exactly right to your business, your data, and your processes.” — Filip Mark, Chief of Staff, Passionfroot
Why choose Attio for your CRM?
Attio takes the concept of a CRM beyond mere contact management.
It’s a powerful, flexible platform designed to work just as hard as you do, constantly syncing your product, billing, and relationship data to keep you ahead.
Whether you’re tracking sales, managing customer success, or any other process unique to your business, Attio’s got you covered.
- Adaptability. Attio isn’t just another tool you need to adapt to. It’s designed to mold itself around your unique business model and processes, ensuring a snug fit into your operations rather than the other way around.
- Real-time Collaboration. Attio brings your team together, offering a genuinely multiplayer CRM experience. You see the changes as they happen, ensuring that everyone, from sales to support, works in harmony and without delay.
- Data-driven insights. With Attio, your data isn’t just numbers and text. It transforms into actionable insights, providing a clear picture of your customer interactions and sales processes to inform every decision you make.
- Designed for teams. Attio understands that the best work doesn’t happen in isolation. It’s built for teams to collaborate effortlessly, with features that ensure smooth communication and task management among team members.
How to get started with Attio
Whether you're a startup looking to scale or an established business aiming to streamline your processes, beginning with Attio is about laying a solid foundation for your team's success.
Here’s how to make the most of Attio from the get-go.
Step 1. Actually go through the onboarding
Attio has a wonderful interactive onboarding that’s really helpful. If you’re a person who usually skips through onboarding I’d recommend getting out of that habit in this instance—as this will get you set up and ready to work immediately in a few steps.
1.1. Sign up with a work email
Attio is a CRM focused on go-to-market teams. It’s for startups and businesses, which is why it won’t even let you sign up with a personal email. You’ll have to sign up with a work one.
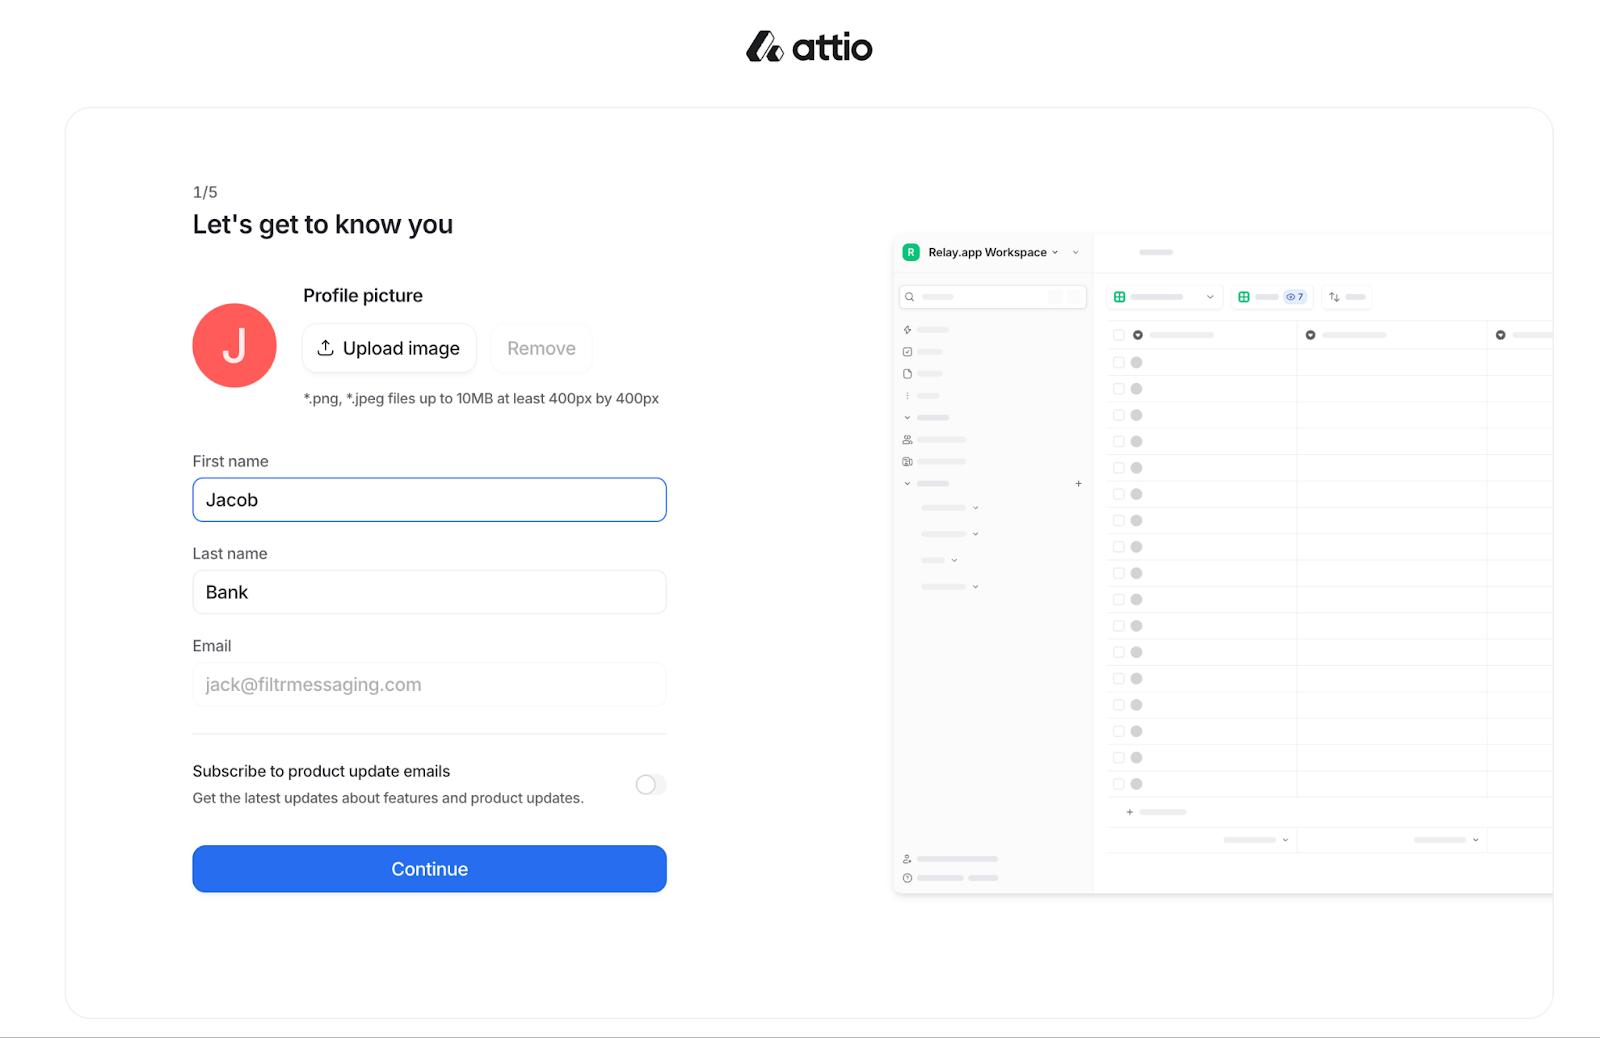
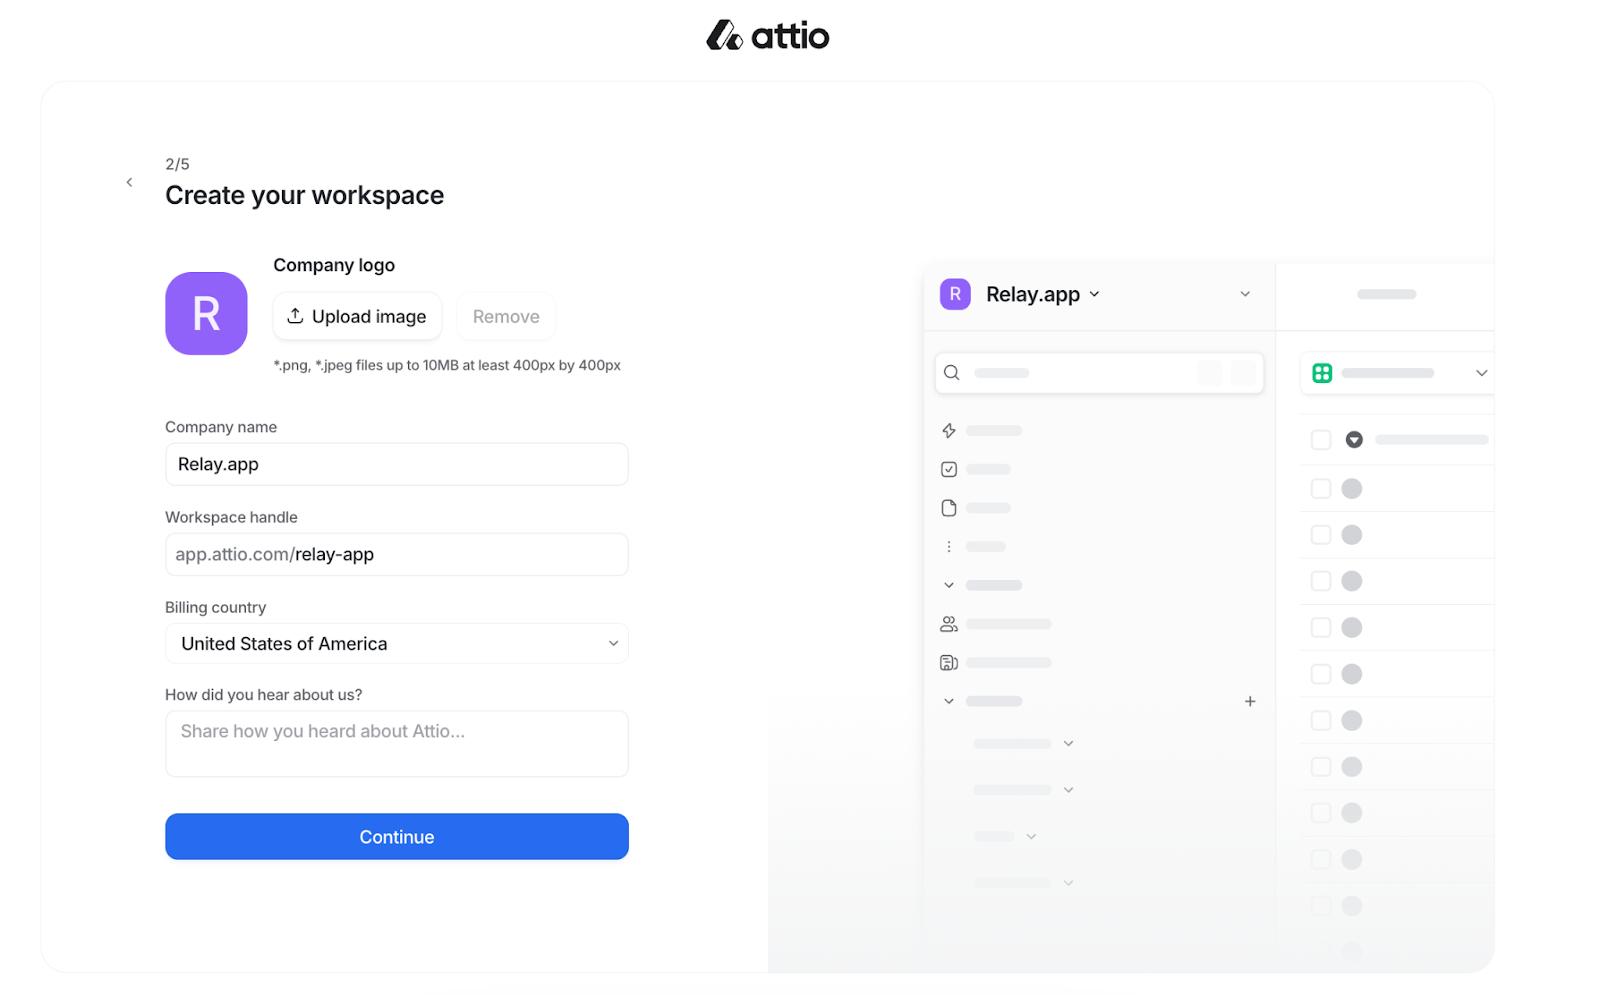
1.2. Create your initial workspace
Once you’ve entered your initial details you’ll be prompted to create a company workspace. Quickly enter your company name, upload a logo, and if you’re feeling generous, let the Attio team know how you heard about their app (say Relay.app sent you 😜).
1.3. Sync your email and calendar
Attio differentiates itself by integrating your email and calendar at this early stage.
Why? Well it allows you to draw data from your calendar to automatically create profiles for your contacts, enriching their details, and ensuring your records are always current.
With options to connect Google or Microsoft accounts, you can choose the depth of shared information:
- Subject line and metadata: Share subjects, participants, and timestamps with your team.
- Metadata only: Keep subject lines and content private, sharing only when necessary.
Prefer not to sync at this stage? Just press skip.
1.4. Customize your workspace with a template
Attio is all about empowering you to build the exact CRM you need—no matter how complex.
There are dozens of templates to choose from across sales, recruiting, marketing, and even Content Creation if you fancy using Attio as a content calendar instead.
Of course, you can always start with a blank canvas, but we suggest a template. Why?
A few reasons: each template comes loaded with dummy data to help you understand the platform, and which template you select impacts the way data is displayed and visualized.
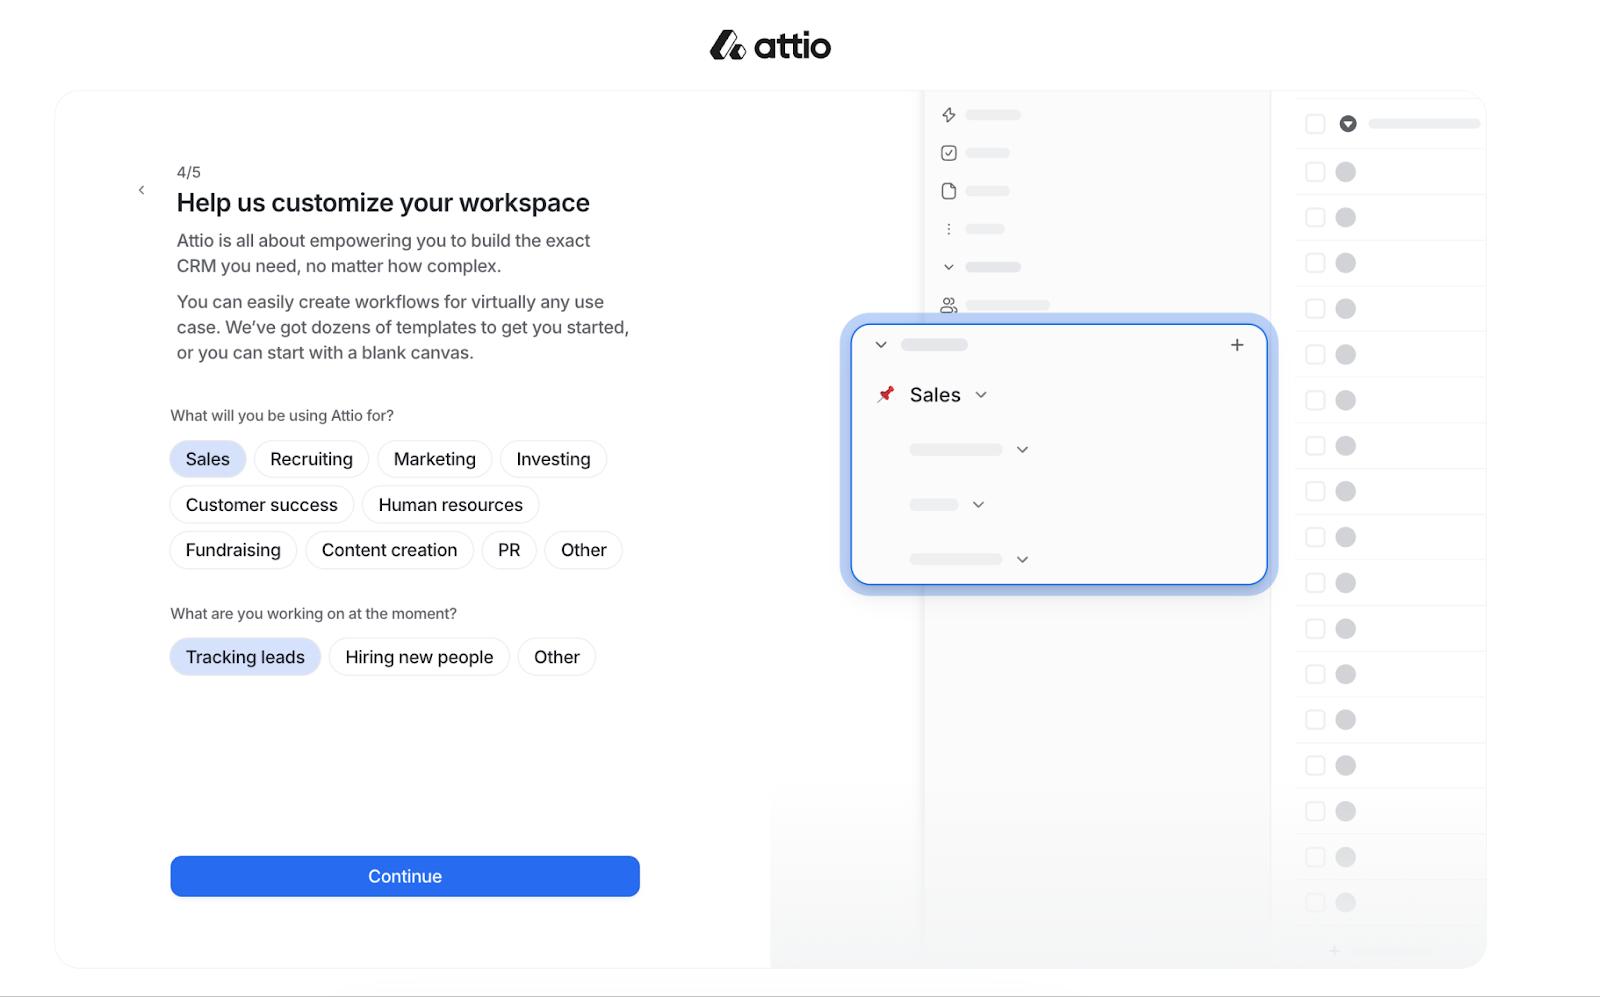
The TLDR—choosing the right template makes your job a whole lot easier, and faster, and that’s what we’re all about!
For the sake of our tutorial I chose a simple Sales CRM to track leads.
1.5. Invite your team members
Now this part is pretty standard. But one of Attio’s biggest selling points is its built-in collaboration features.
It’s designed to help you share communication and relationship insights across your CRM to make it easier for your team to work in harmony.
And for your team to work in harmony… you need to actually add your team!
Here’s the spot to do just that. Invite your fellow team members and get the multiplayer started like it’s 1999 and you’re playing Goldeneye in your cousin’s basement.
Step 2. Get acquainted with the interface
If you’re transitioning from a traditional CRM you might be feeling a bit out of place. Compared to many default CRMs, Attio feels unexpectedly modern.
But if you're accustomed to Notion's sleek interface Attio's design will feel familiar. In fact, logging in to Attio for the first time can make you second-guess whether you’re actually in Notion.
Two things: If you’re new to the look, you’ll soon get the hang of it. And if you’re a Notion user wondering why you shouldn’t just create a database, rest assured there’s plenty of additional complexity under the hood.
By default Attio includes illustrative dummy data. We found that great to demystify the design and offers a clear glimpse of the potential CRM setup you can have.
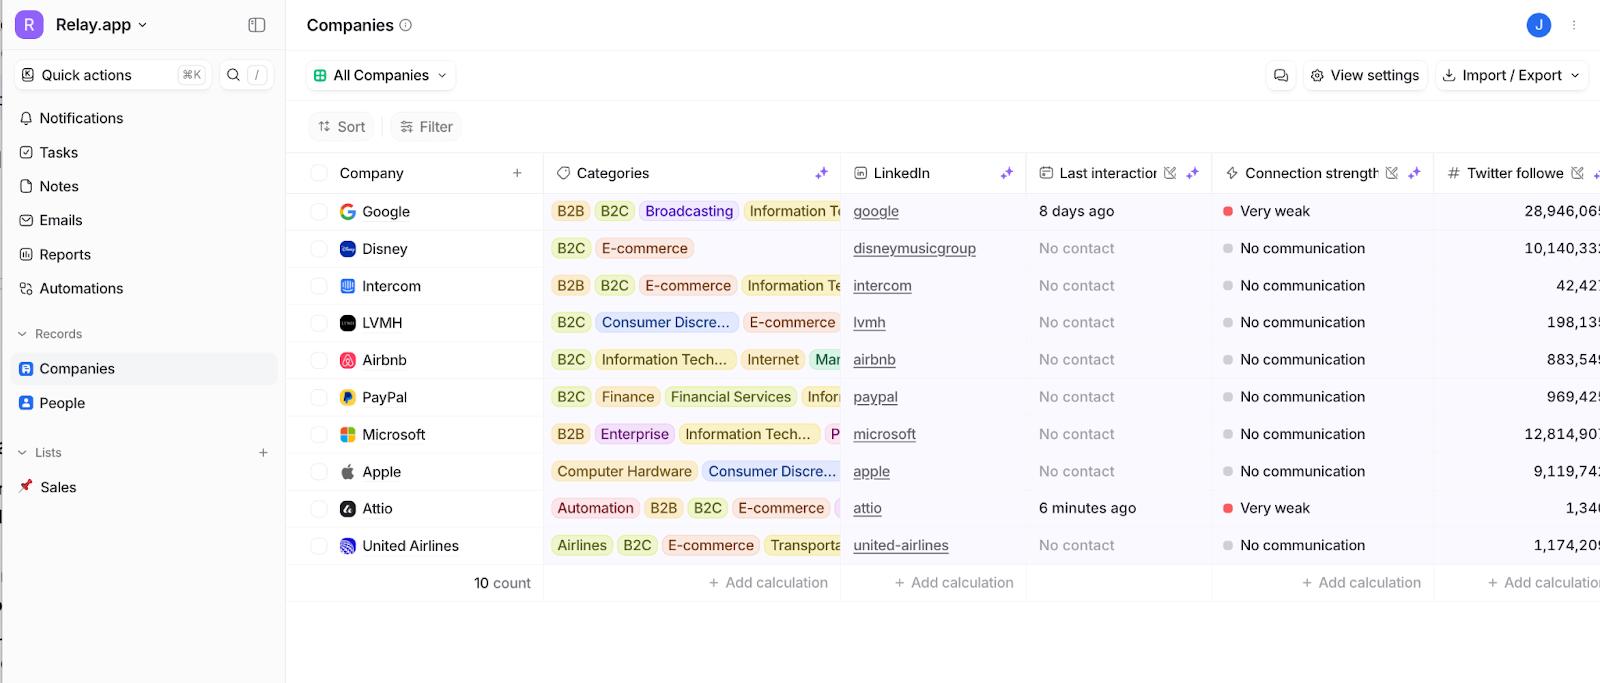
Luckily, navigating Attio is straightforward once you’re familiar with its two main elements: the sidebar and the main panel (where your CRM data is displayed).
The sidebar is your Attio control hub. It's designed to be both expandable and collapsible, fitting your workflow needs. Within it, you'll find:
- Control panel: Here's where you can manage the essentials—swap between workspaces, tinker with your settings, change themes, or sign out.
- Navigation panel: This is your gateway to the CRM's core, from accessing records, notifications, tasks, and notes, to diving into emails, reports, and automations.
- List section: Your created or shared lists live here, ensuring you're always just one click away from your data.
Oh, and Attio makes it easy to navigate with cmd + k for commands or / for CRM searches, putting efficiency at your fingertips.
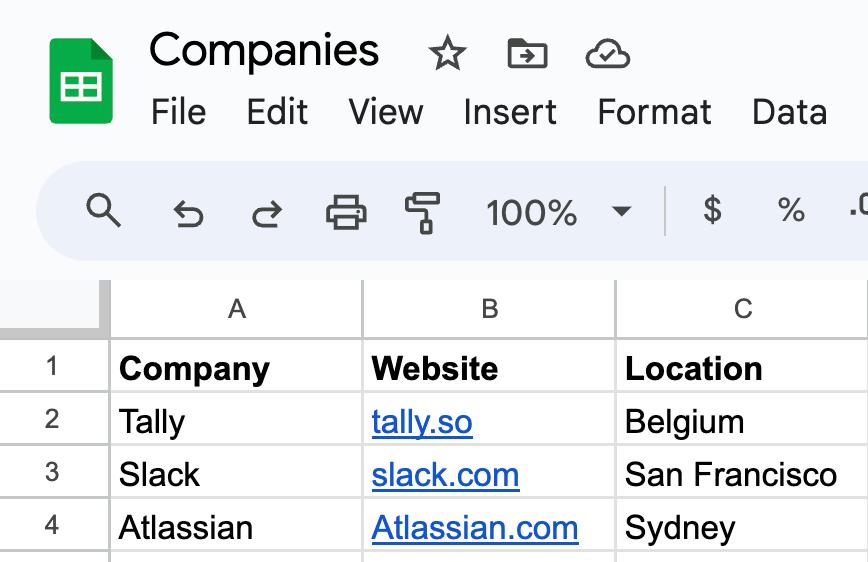
Step 3. Import your data
Once you’re acquainted with Attio it’s time to replace that dummy data with your own. This can be done with a simple .csv file. Here’s how you can transfer that precious info into your new CRM:
3.1. Prepare your import
First off, decide what kind of data you’re importing. You can create your own custom data type, but the two defaults are people and companies.
Attio categorizes imports by object types. This means each dataset should align with its corresponding list (e.g. either people or companies not both). If your .csv is a mix of both, you’ll need to split it into separate files for a clean import.
3.2. Set up your Attio list
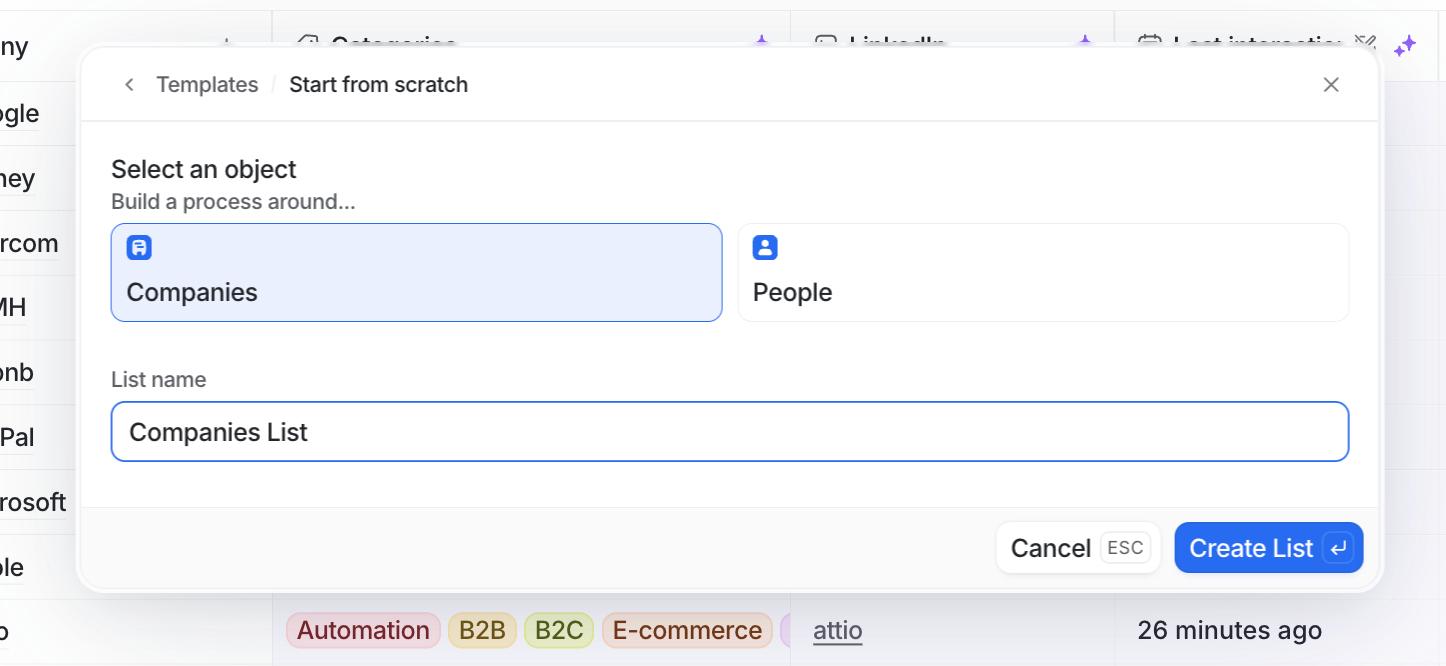
Before importing your data you need a destination List in Attio. For example, we’re importing company data so we created a “Companies Import” list as the destination.
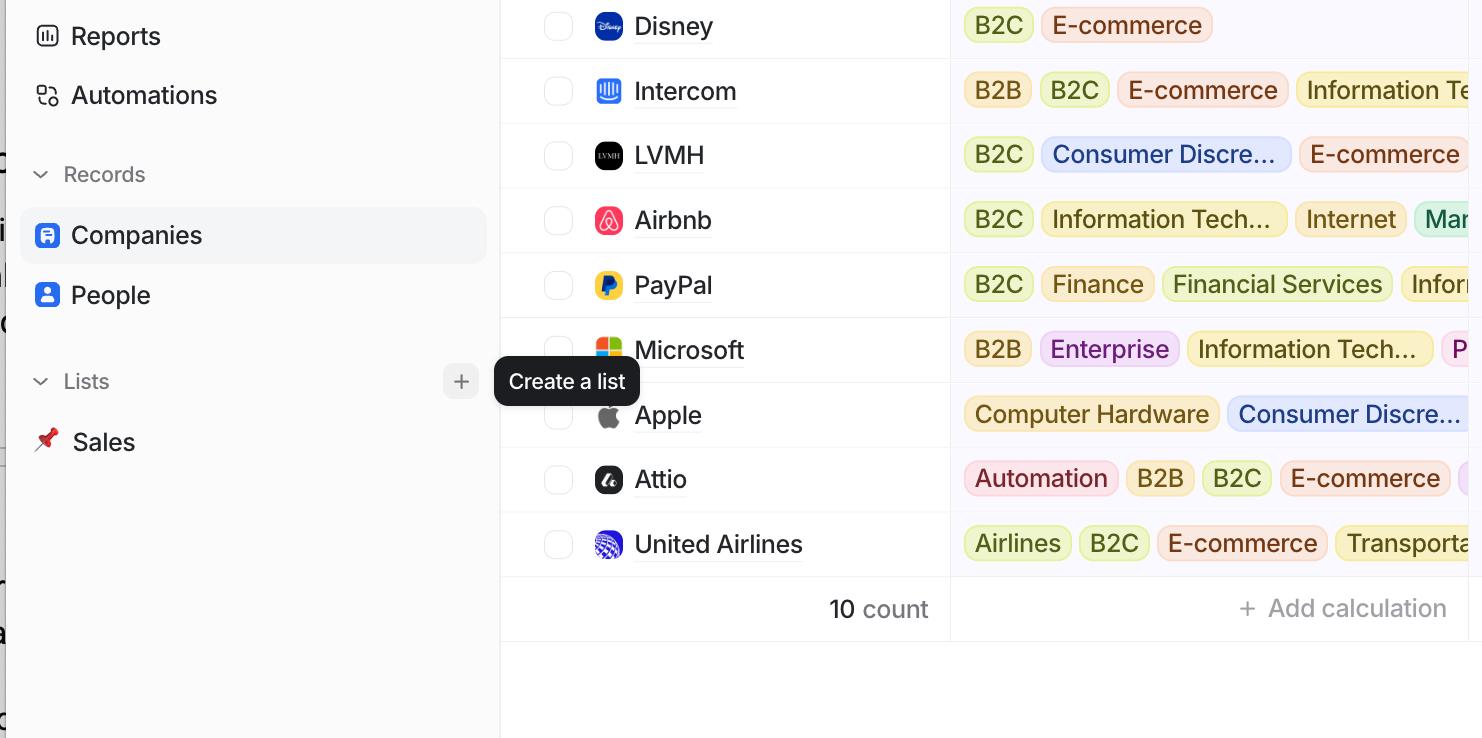
To create a list, press “+” beside Lists in the sidebar, choose to start from scratch and select Companies as your Object. Name it whatever you like, but make sure its descriptive to keep your data organized.
3.3. Populate your list
Our list in Attio is ready—time to populate it. Navigate to Import / Export > Import companies within your newly created list and upload your .csv file containing the company data.
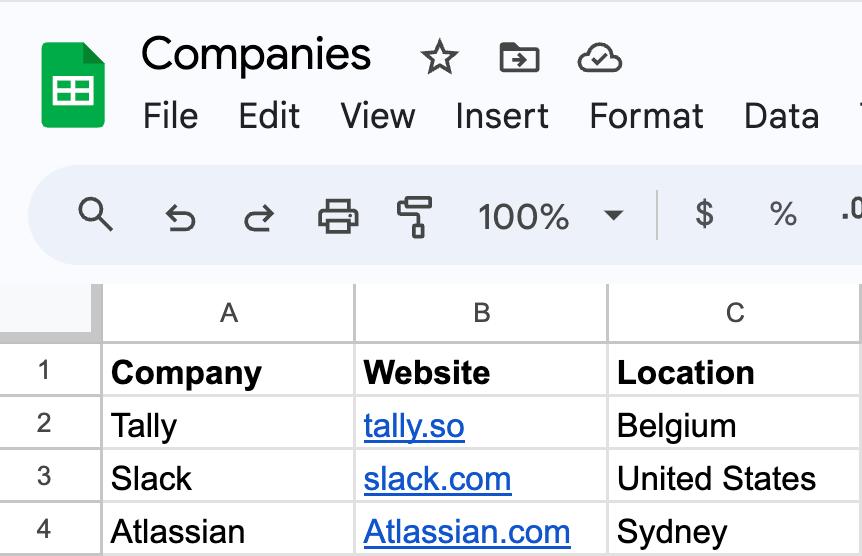
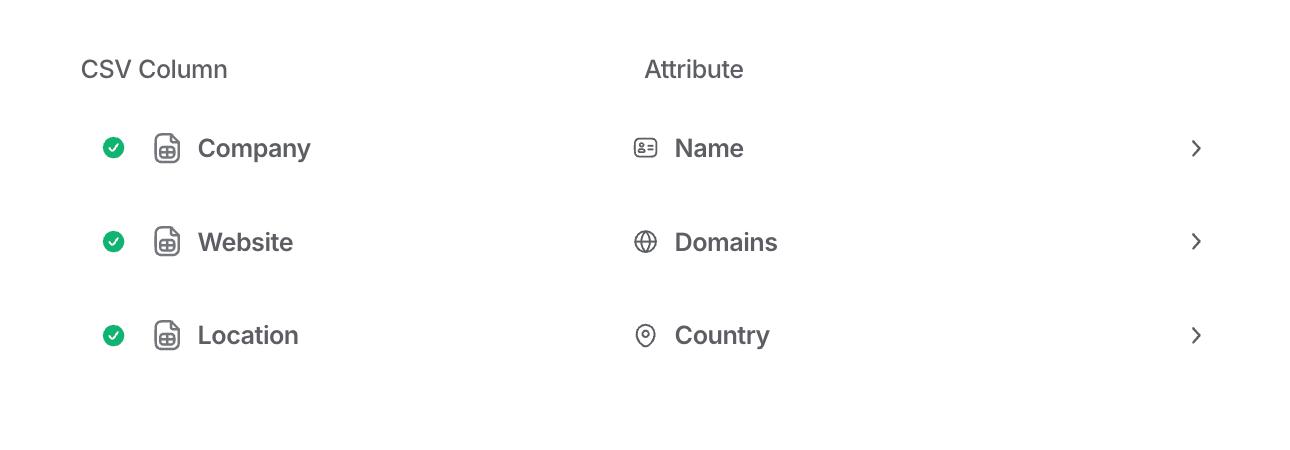
When importing, you'll map your .csv columns (like Domain, Company Name, and Location) to Attio attributes, ensuring every piece of data finds its right place. Attio has a few smart features to make this process seamless.

3.4. Review your data
Attio flags any hiccups in your data for review. If there’s an issue, like a misaligned country attribute (which we had because we accidentally chose Country instead of City) you'll have a chance to correct it before finalizing the import.
After resolving any issues, Attio checks for existing records to avoid duplicates. You'll have options to update, add anew, or skip these records, giving you full control over the import process.
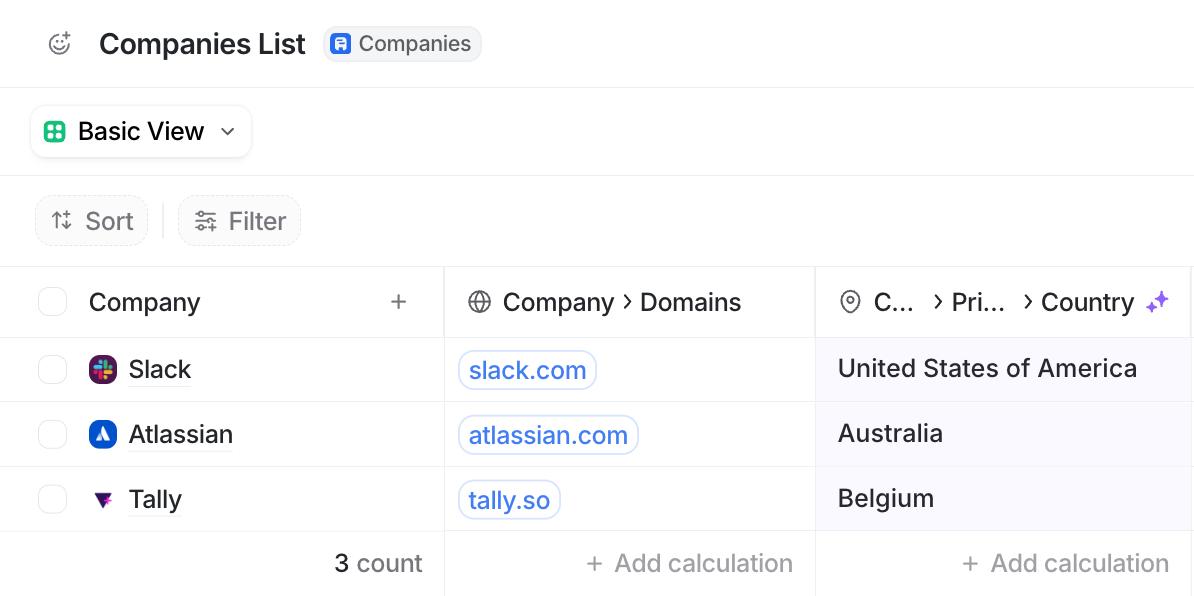
Our import was immediate because we only had a few companies.
But the good news is that once you initiate the import, it runs in the background, allowing you to keep working uninterrupted—even if you’re adding large datasets.
Getting to know Attio’s data model
That’s all there is to getting your Attio CRM up and running. But there’s a lot more to getting your data organized and your CRM in working order.
And Attio has a unique approach to data organization.
While most of their ideas are familiar, execution and naming conventions differ compared to other CRM tools.
Here's a breakdown of its core labels and elements.
Objects
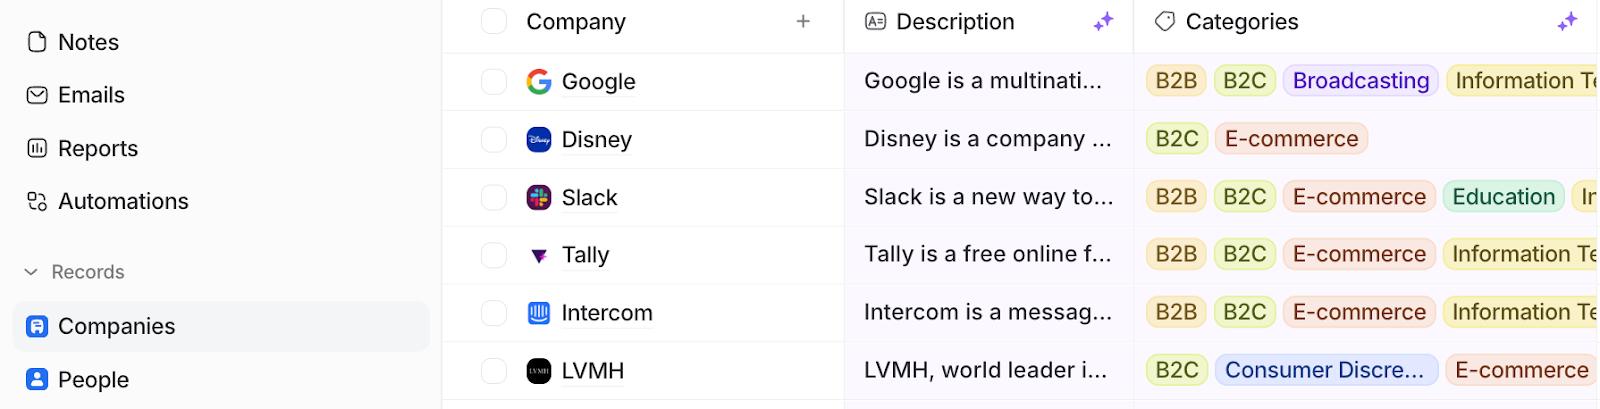
Objects are the foundation of your data structure in Attio. Standard objects like People and Companies come enabled by default, allowing you to manage information effortlessly. For more specialized data tracking, you can create custom objects, tailoring your CRM to fit any unique aspect of your business operations.
Attributes

Attributes are essentially the identifiers for the type of information each data point represents within an object, akin to column titles in a spreadsheet. They bring structure to your data, enabling you to capture details such as company names, cities, foundation dates, and more in a structured manner.
With Attio, you can define both object attributes (global attributes that span across your CRM) and list attributes (specific to custom lists), providing unparalleled flexibility in how you manage your data.
Records
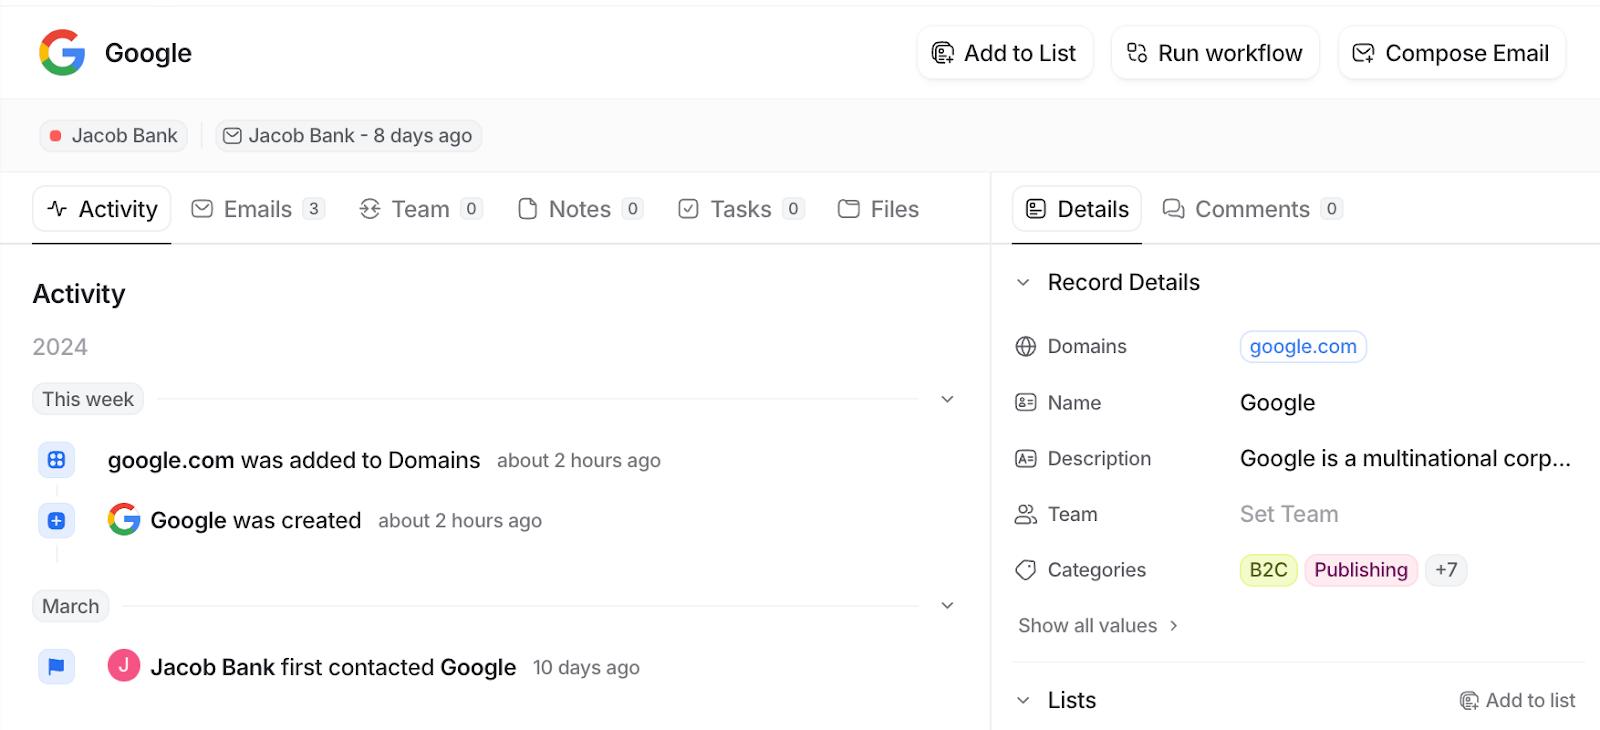
Every entry within an object—be it a company, person, or deal—is a record, comprised of attributes that describe it.
Records are the individual rows in your data structure, each representing a unique entity with its own set of information.
Lists
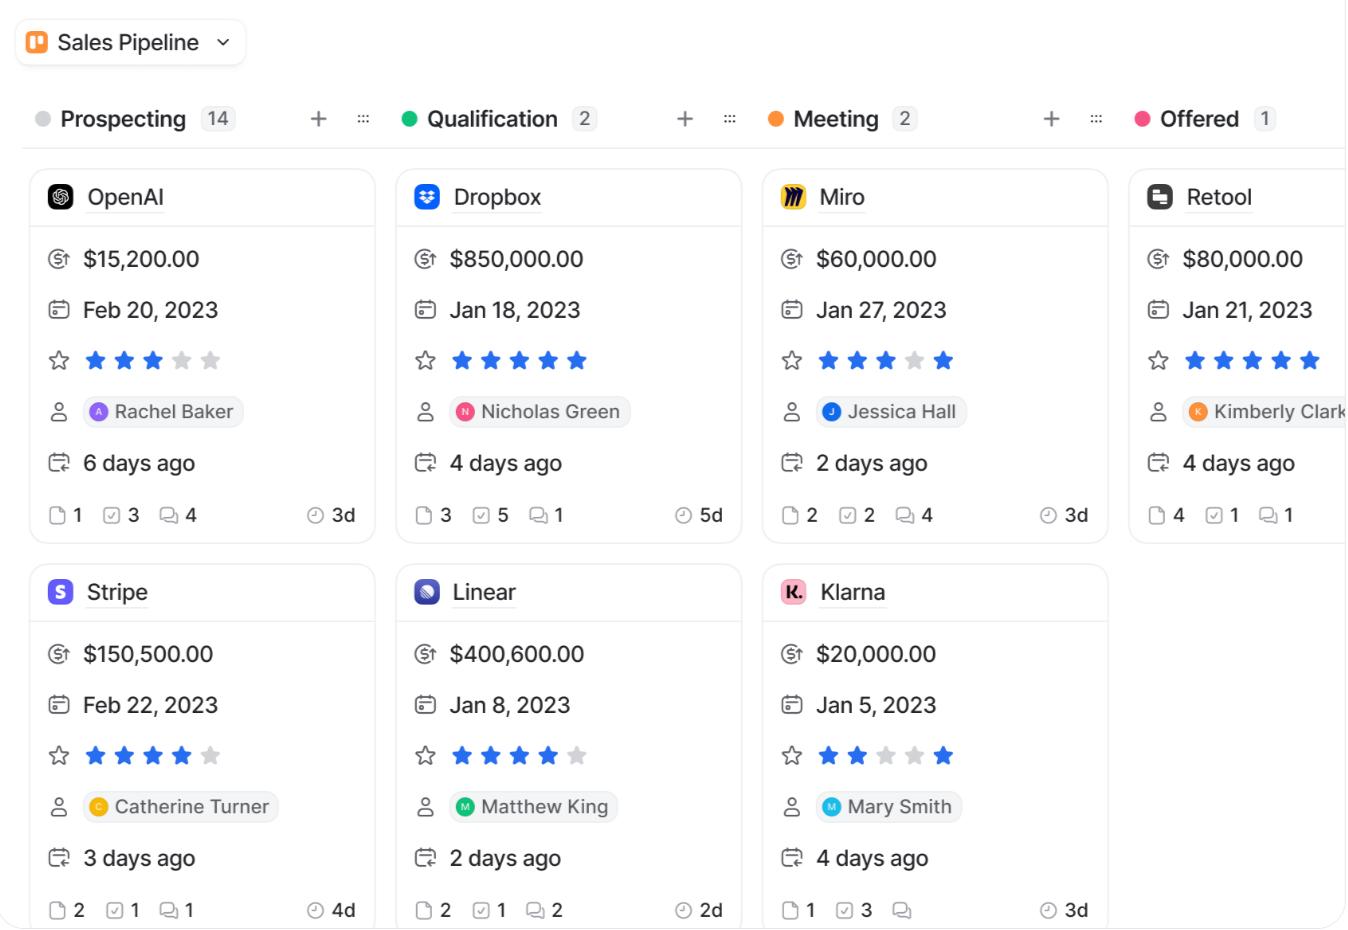
Attio’s lists feature allows you to group records in customizable ways.
Lists enable you to build specific business processes around your data, adding unique attributes and organizing records without altering the original data (kind of like Airtable’s views)
This feature is invaluable for teams with varying tasks, as it supports tailored views and workflows without compromising on data integrity or visibility.
Other notable features
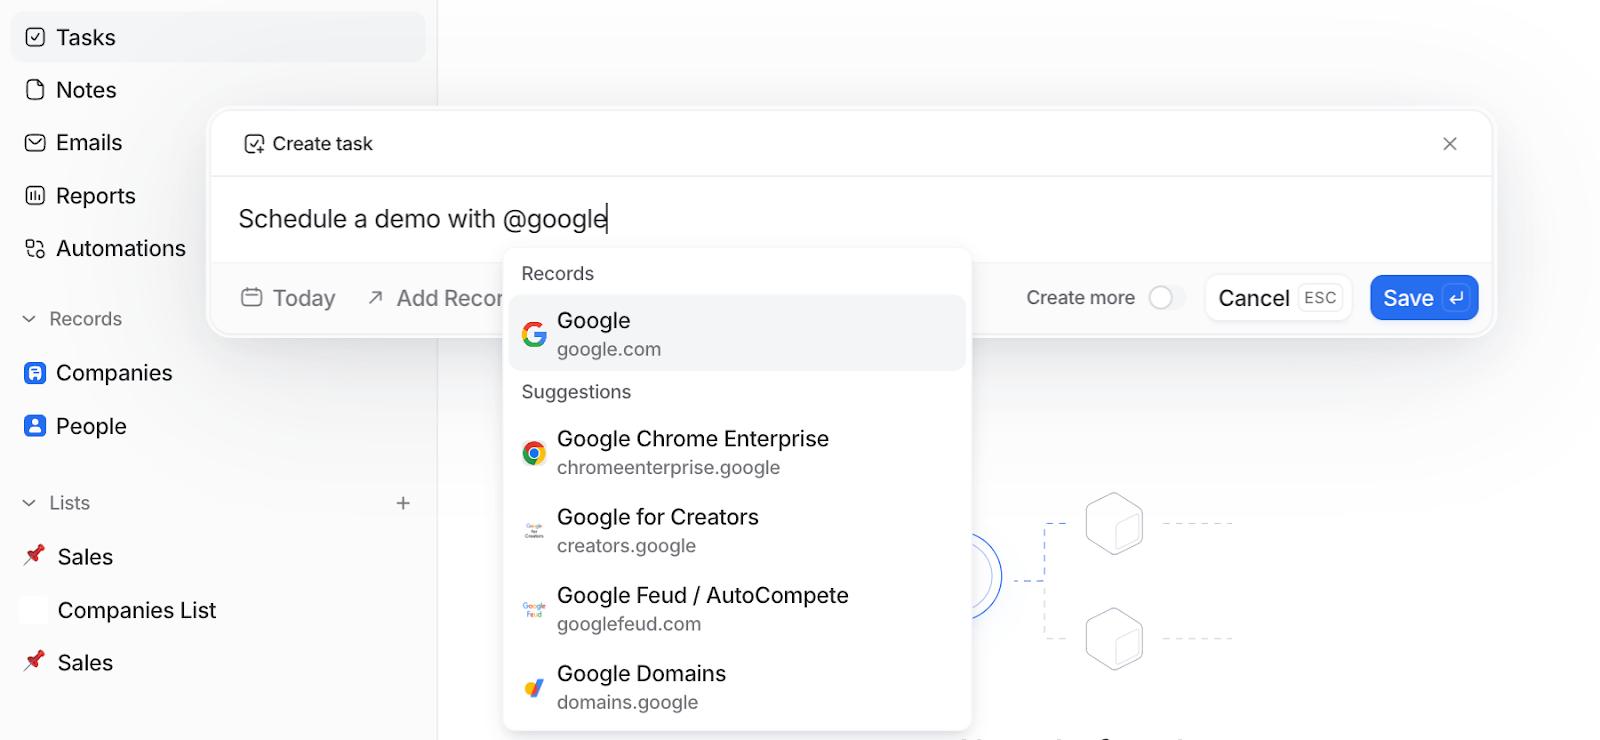
Attio's data model sets the stage for leveraging its full capabilities. It's further enriched by features designed for modern team collaboration, including tasks, notes, emails and workflow automations.
Automate your Attio CRM with Relay.app
Those workflow automations we just mentioned? They’re great for simple CRM-related workflows, like creating a reminder to fill out the Estimated Contract Value for your deals, or extracting useful data and pushing it to Slack, or even sending live-updates about MRR changes.
But with Relay.app you can extend this functionality much further to sync data across platforms and streamline tasks between your CRM and your entire tech stack.
Let’s look at a few popular Relay.app Attio automations:
Sync data with Coda
Automatically push new Attio records to Coda tables, ensuring that your team always has the latest, most relevant project information at their disposal. This direct line between Attio and Coda eliminates manual data entry, keeping your team focused on what matters.
Add new data from online forms
Instantly create Attio person records from submissions across popular form platforms like Webflow, Tally, Google Forms, and Typeform.
This automation does more than save time; it ensures every potential customer is immediately captured in your CRM, ready for follow-up, without slipping through the cracks.
Share data with Mailchimp
Maintain a consistent and updated subscriber list between Mailchimp and Attio. This synchronization ensures that your marketing efforts are always targeted at the right audience, enhancing the effectiveness of your campaigns.
Automatically updating subscriber information in Attio based on Mailchimp activity keeps your communications relevant and personalized.
Connect to your meetings
Keep your calendar in sync with your CRM without lifting a finger. Automatically log details of new meetings and appointments from Calendly and Cal.com into Attio.
This integration is invaluable for sales teams, consultants, and anyone who relies on meetings to drive business. It ensures that every appointment is accounted for in Attio, providing a complete overview of client interactions.
Over to you
These automations are just the beginning of what you can achieve with Attio and Relay.app.
So why not get your CRM setup, and sign up to Relay.app to see what you can achieve through our powerful automations, in-line AI and human-in-the-loop workflows. Get started today.
Related reading:
- How to build a Google Sheets CRM
- How to automate your SmartSuite CRM
- How to build a custom Notion CRM
- How to Build an Airtable CRM

