Webhook triggers are one of Relay.app's webhook features. You might use them to kick off workflow runs based on incoming HTTP requests from an external server.
This is particularly useful when you need Relay.app to integrate with a custom or internal system your company uses, or an app that we don't yet have a formal integration with.
Configuring the webhook trigger
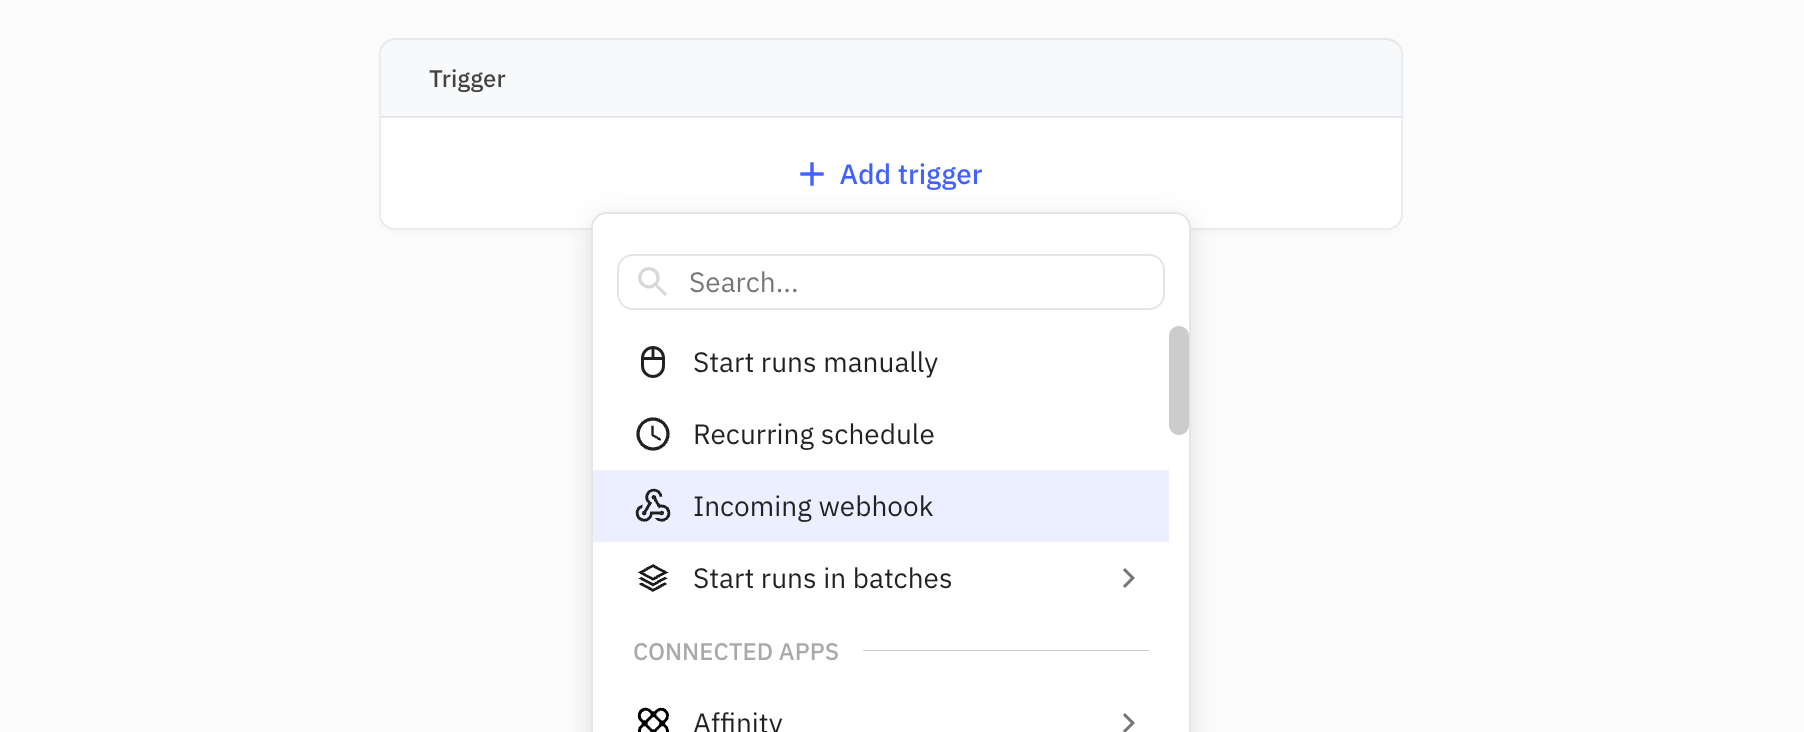
To add a webhook trigger to your workflow, select the Incoming webhook entry from the menu. After that, it's time to configure it.
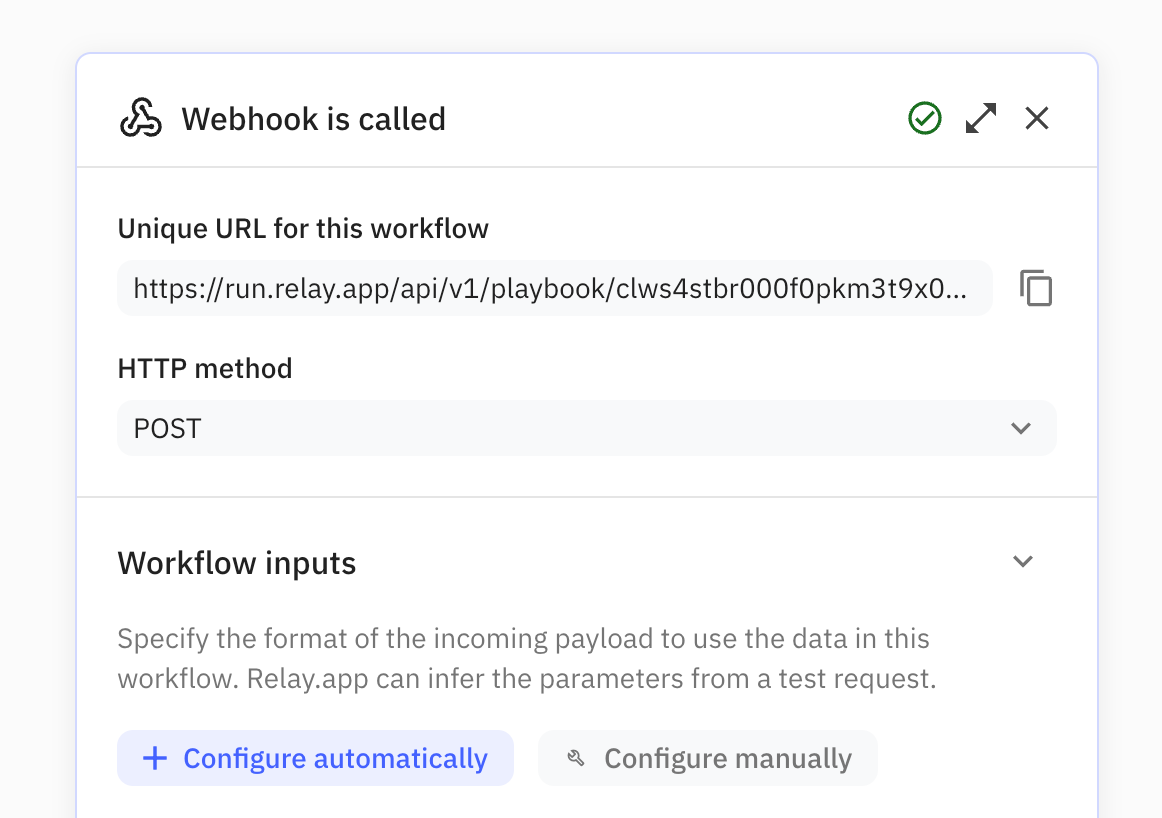
At a glance, there are three important pieces that together make define the configuration of a webhook trigger:
- The unique webhook URL: a URL that's generated for this workflow, which the external system should make HTTP requests to.
- A chosen HTTP request method: either POST or GET. You'll typically make POST requests for increased flexibility and safety.
- The workflow input specification: a list of variable inputs that your workflow requires to run. These inputs will enter the workflow through the payload of the webhook request.
Next, let's go through the configuration in three steps:
1. Choose a request method
Relay.app currently supports POST and GET requests to trigger workflow runs. In many cases, the server that issues the request will only let you make POST requests (which are recommended for flexibility and safety regardless).
While POST is the default selected request method, you may also change it to GET.
2. Configure the webhook URL externally
After setting the request method, it's time to configure the external server/app to use your workflow's unique webhook URL as its endpoint.
The details on how to do this are significantly different from system to system; this tutorial assumes you're familiar enough with the other system or app that you'll be able to find your way!
3. Wire up the payload as workflow inputs
Finally, you'll need to wire up the payload of the webhook as inputs to your workflow. When using a GET, the payload should be encoded as URL parameters, when using POST as JSON* in the request body.
*Technically you can use some other formats as well when manually configuring.
Wiring up the JSON payload for POST requests
For POST requests, the payload should be present as JSON in the request body. To wire up the JSON payload as workflow inputs, we offer three primary mechanisms for easy configuration:
- Configuration via a test HTTP request
- Configuration by pasting a JSON snippet
- Configuration by manually "building" the JSON object
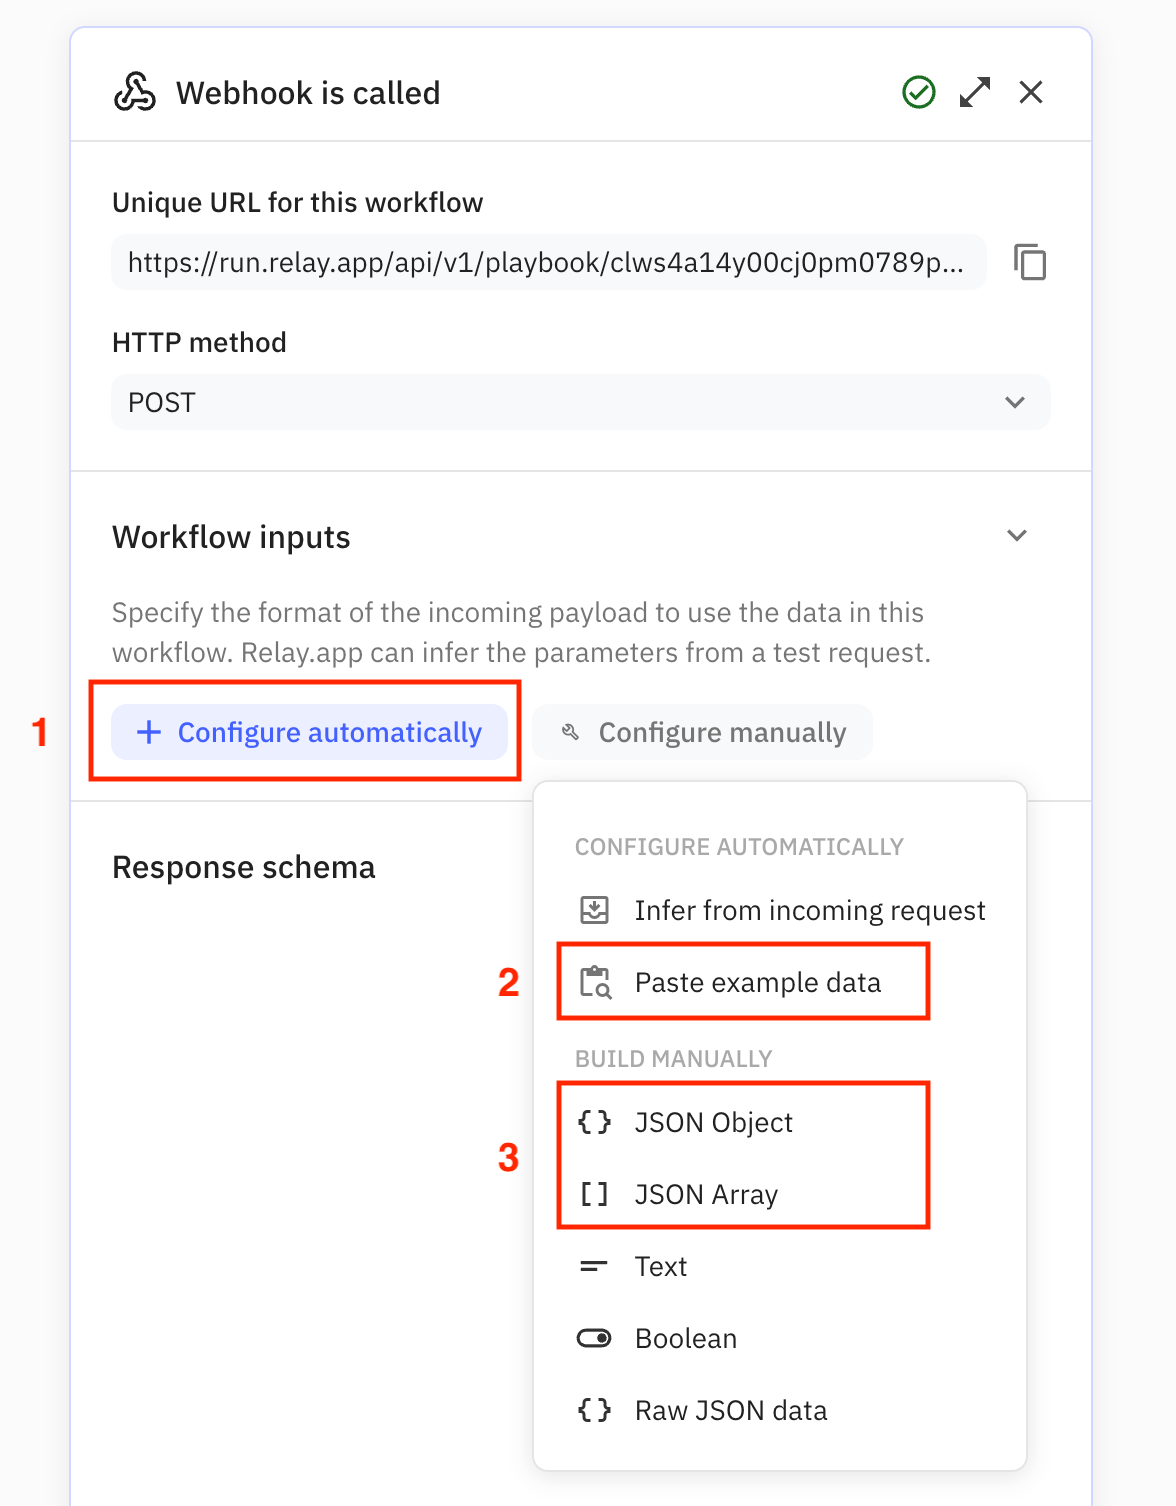
The first option is by far the easiest, but you might not always be in a position to generate test requests, so we offer alternatives mechanism as well.
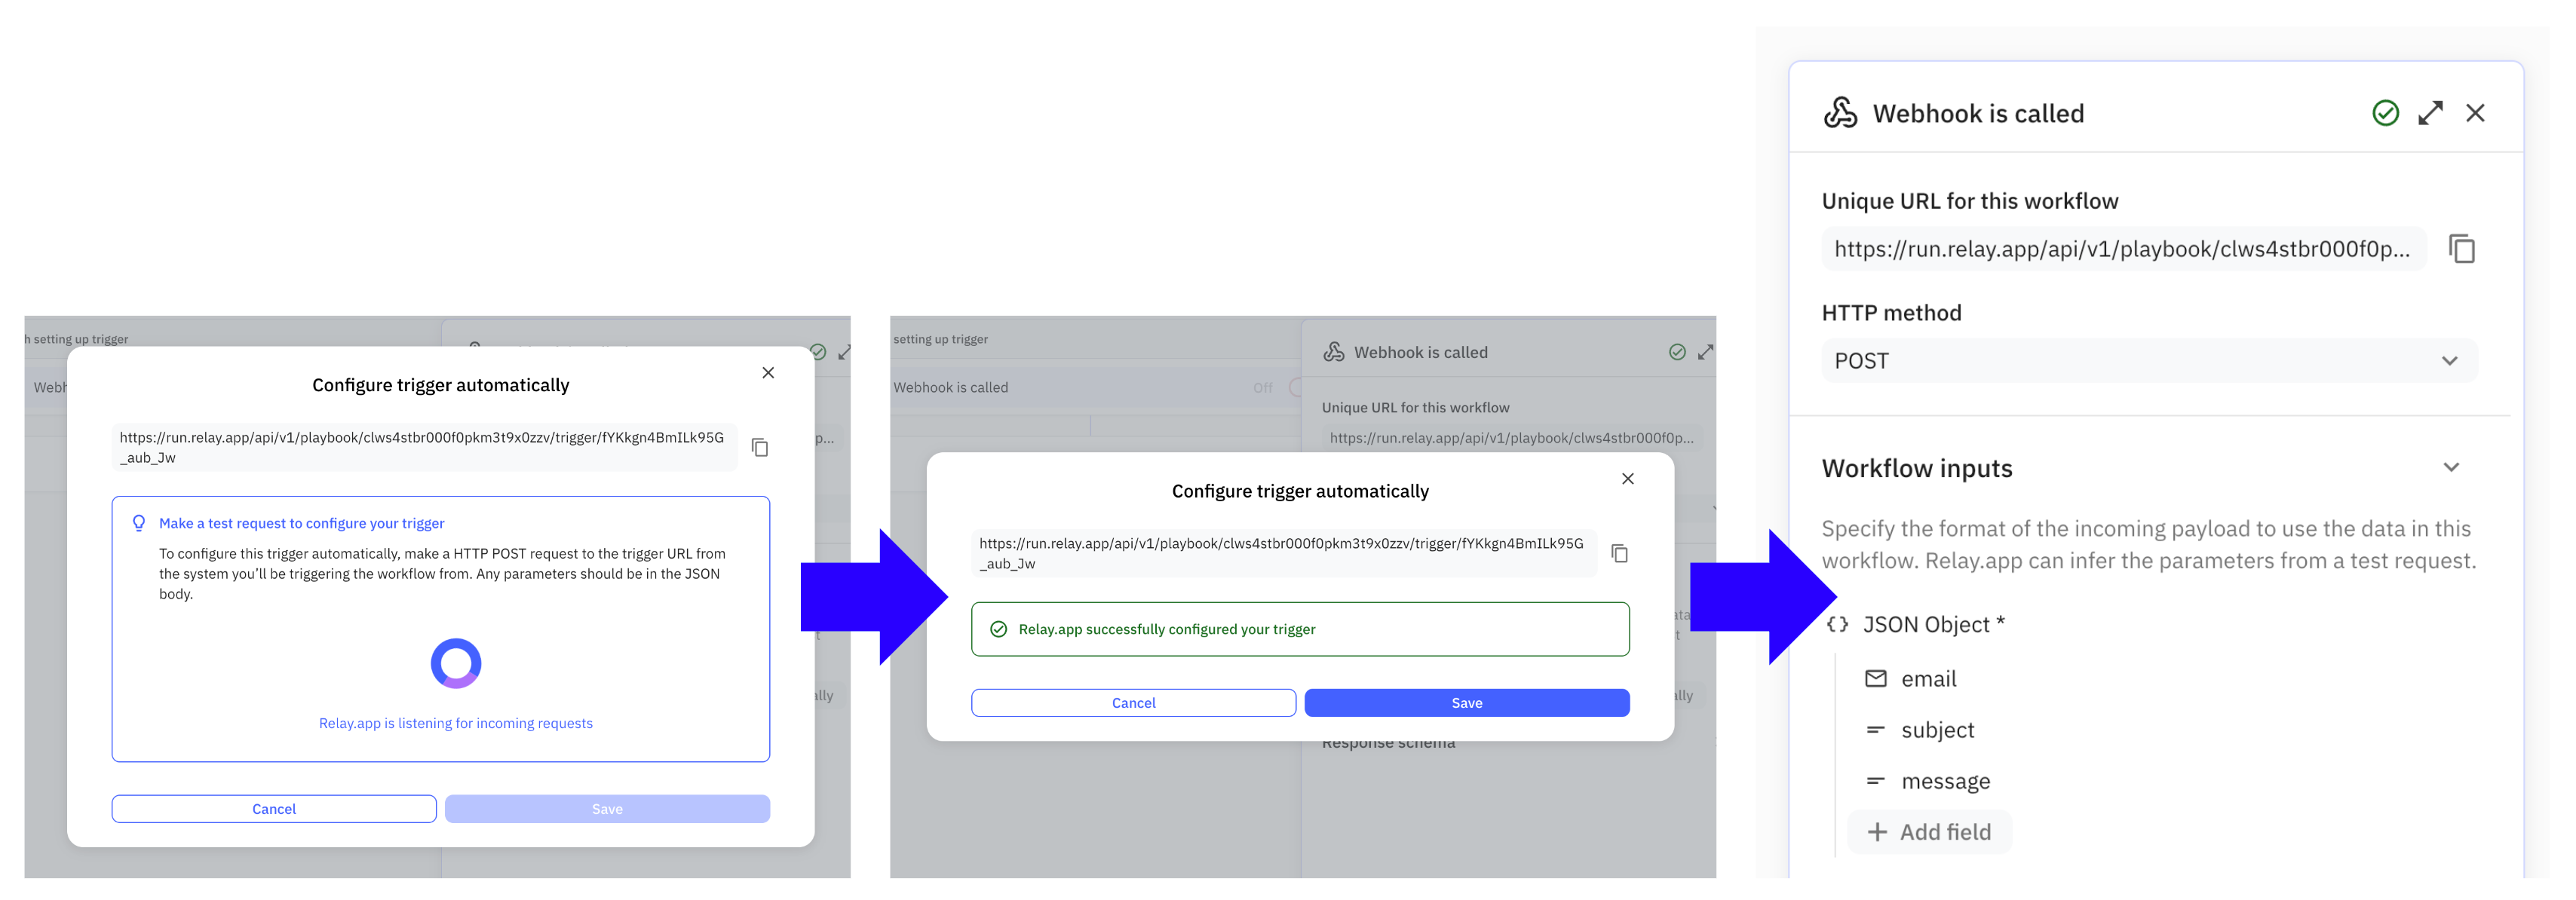
This is the recommended way of wiring up the workflow inputs. After clicking the Configure automatically button, a modal dialog will show up to inform you that Relay.app is listening for a test request made to the webhook URL.
Once a request arrives, we'll tell you if the payload was parsed correctly and lets you apply the structure of the received JSON as your workflow inputs. This means that all (nested) JSON properties that were present in the test request will be translated into workflow inputs.
Ideally, you'll issue the test request directly from the server/app that you'll want to integrate with. If you don't have access, you may also use a tool like curl or Postman but you should keep in mind that this is not perfect, as these requests are not coming from the actual server or app.
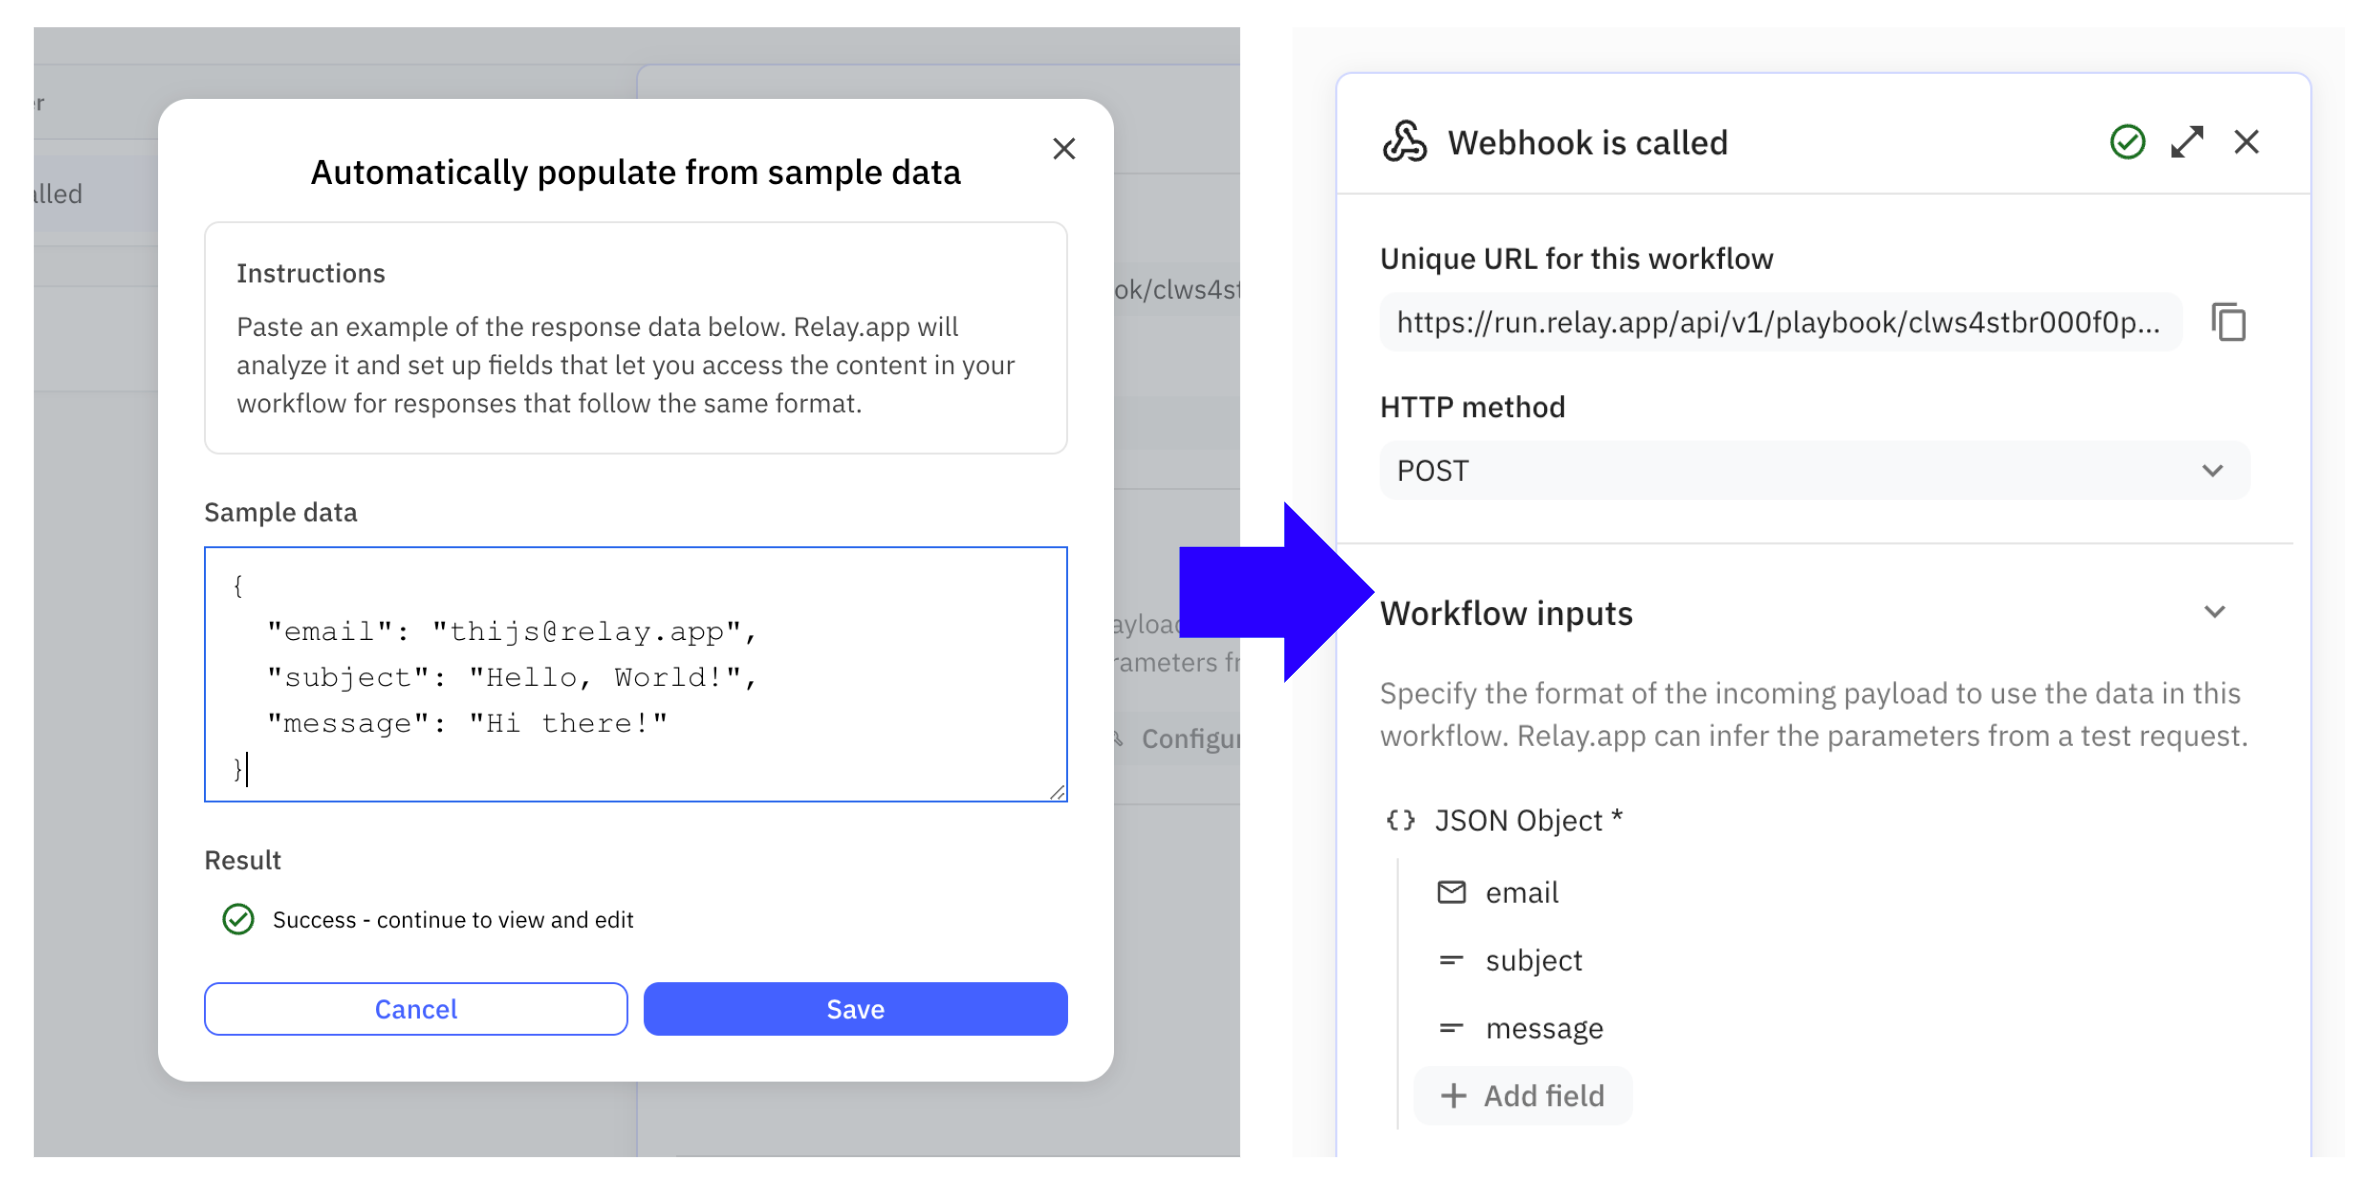
If you know exactly how the JSON payload will look like, you may pick Paste example data from the Configure manually menu, and paste the data in there.
All (nested) JSON properties in the pasted data will be translated into workflow inputs.
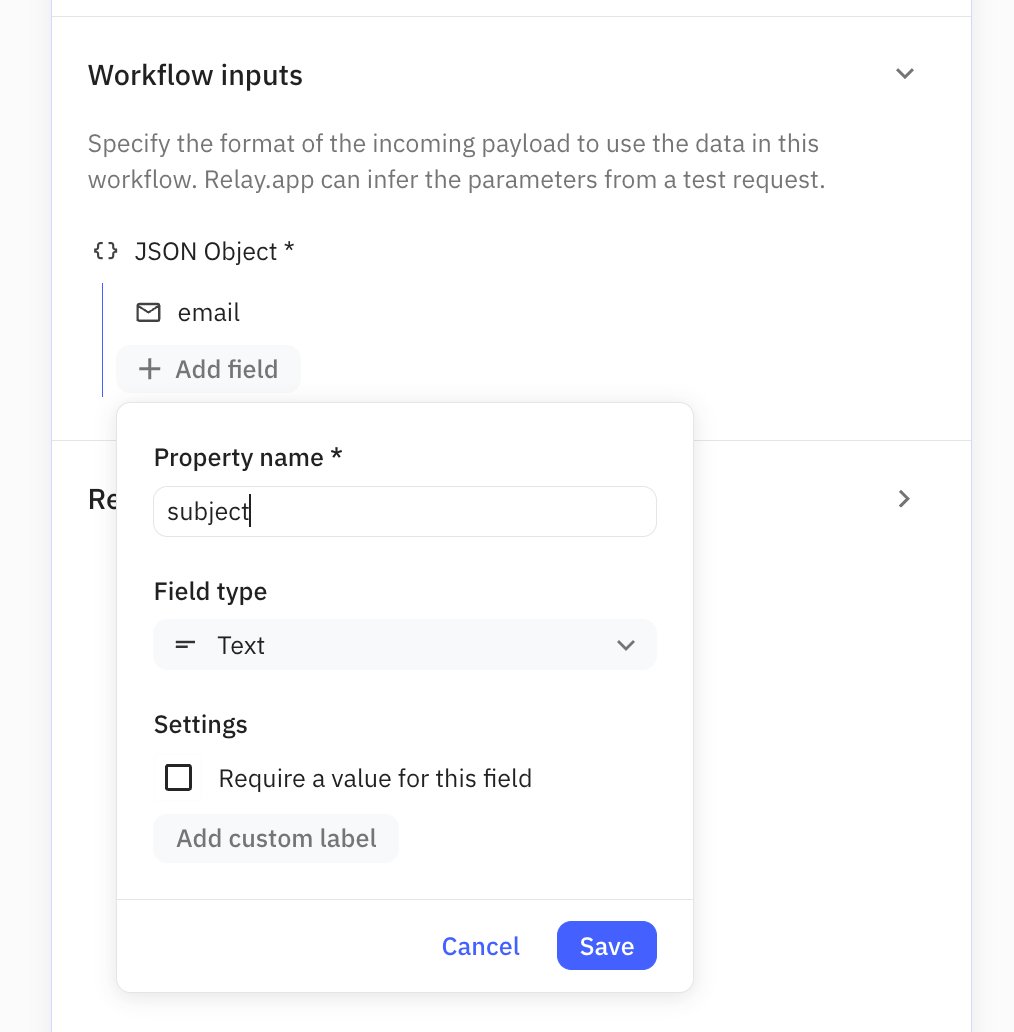
Finally, you may also manually specify the structure of the JSON payload you expect. This approach is the most error-prone, so the earlier mentioned approaches are highly preferred.
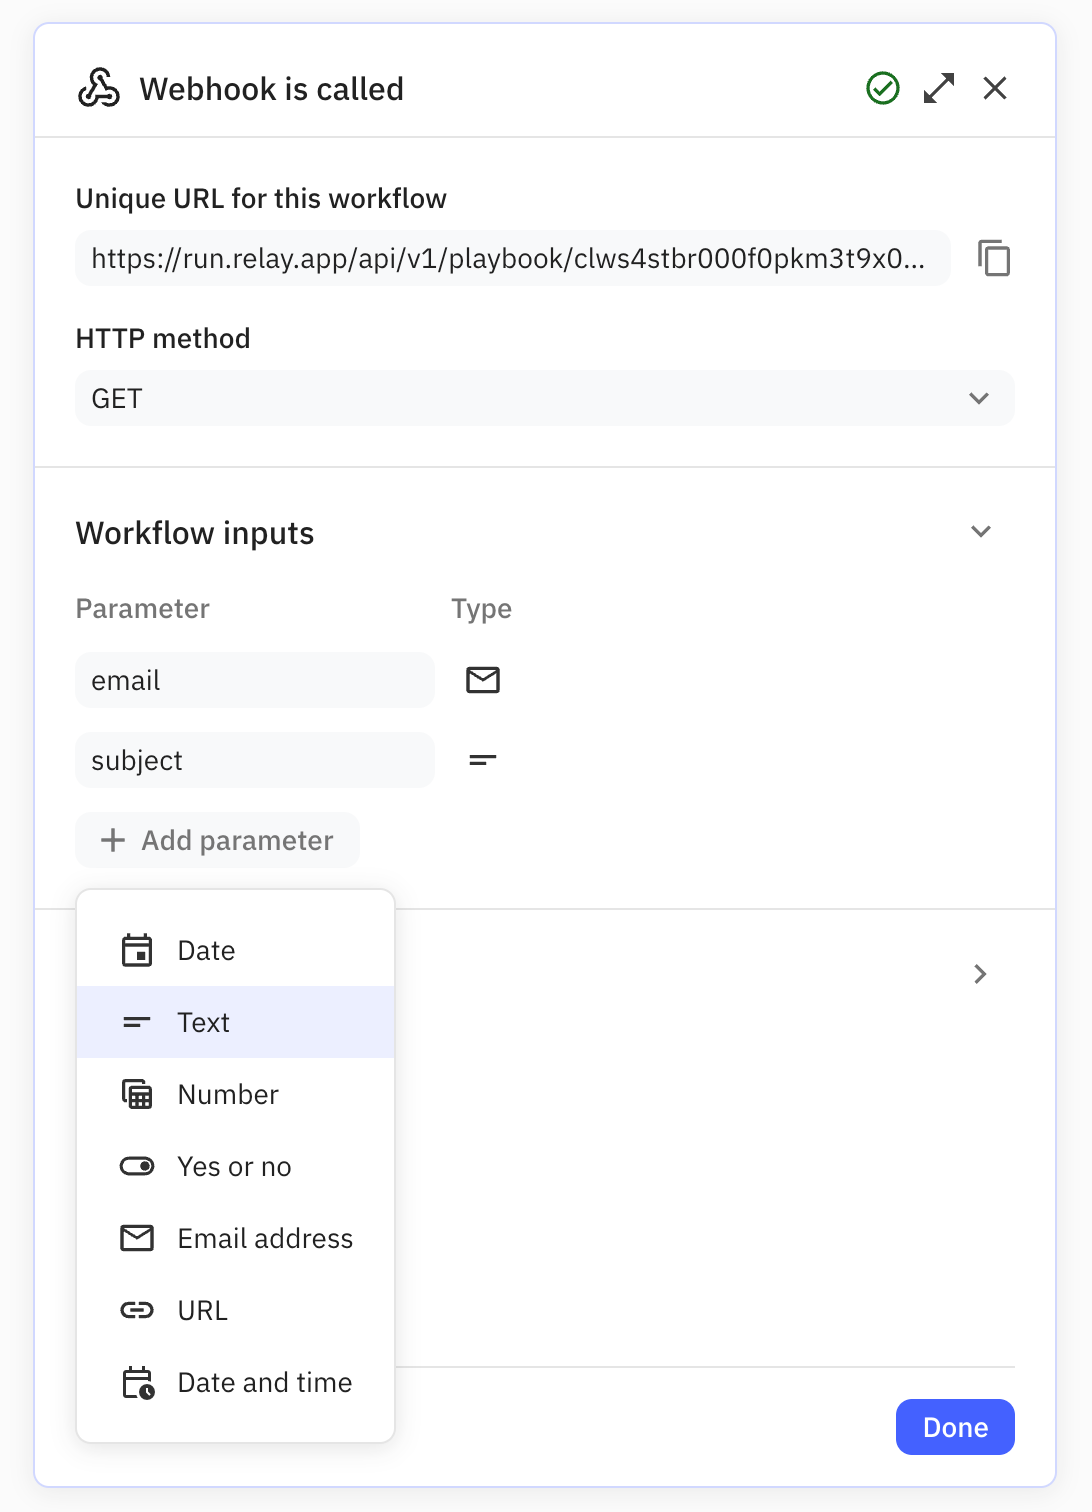
Wiring up GET request parameters
If you're using the GET method, the payload has to be present in URL parameters appended to the webhook URL (e.g. ?input_one=value1&input_two=value2 )
To make sure these URL parameters are usable as data in your workflow, you'll need to manually specify them in a similar way as you manually build a JSON payload for a POST request: explicitly add a workflow input for each URL parameter that you need from the request.
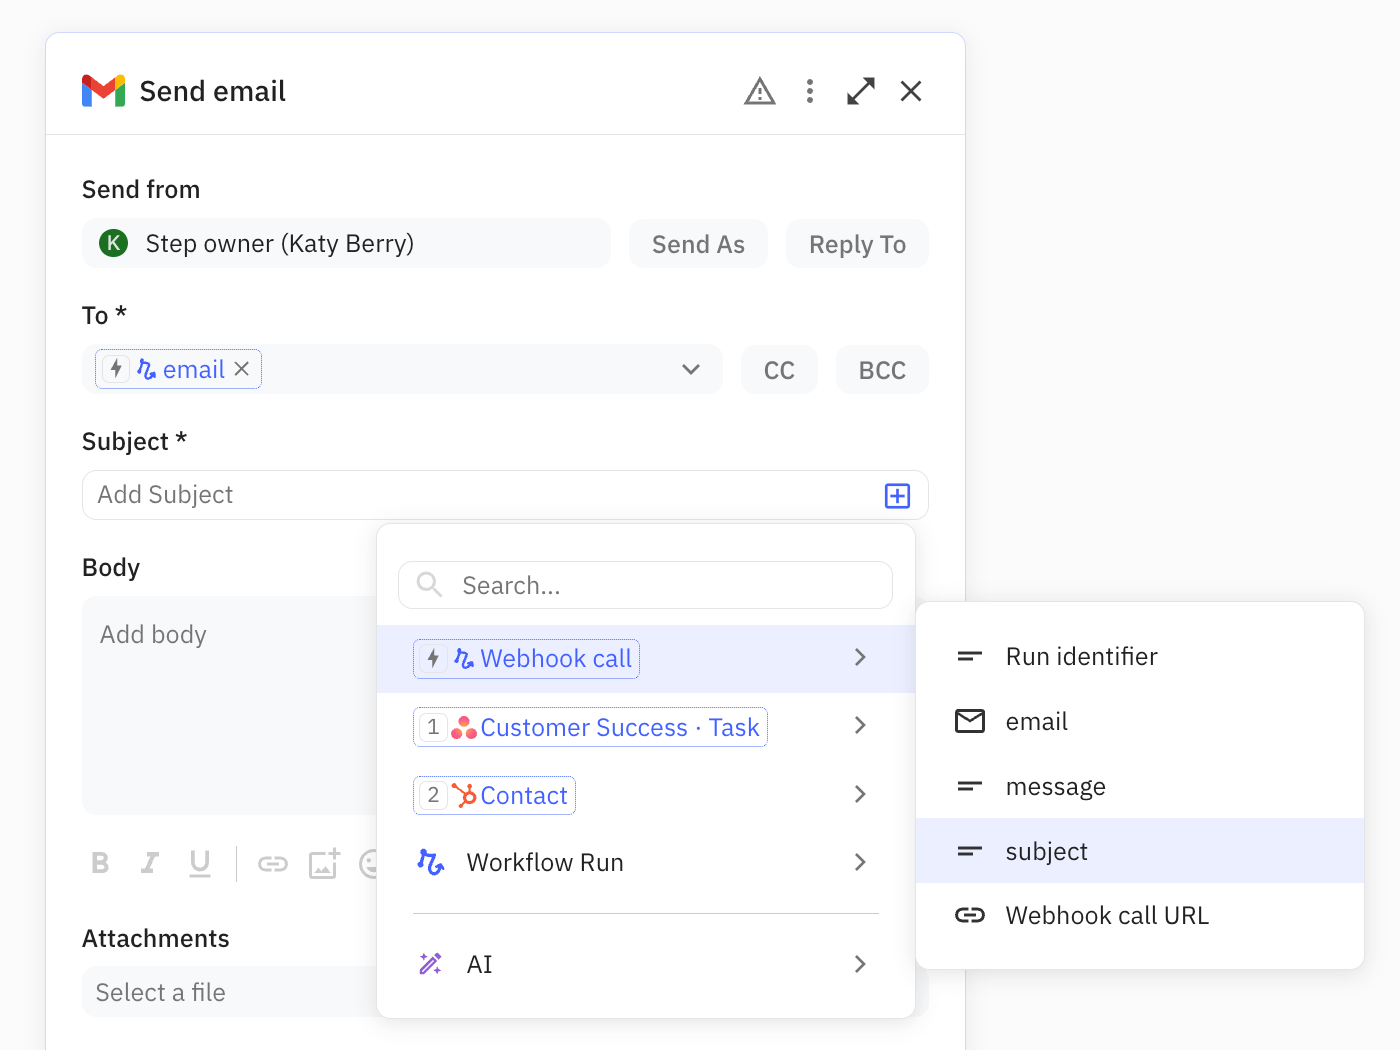
Using data from the webhook payload in your workflow
Using data from the webhook payload is just like using data from any other app object: you will be able to access it through a dedicated webhook call object in all data pickers across your workflow.
Testing the webhook trigger
To test your workflow with the webhook trigger, make sure to add at least one Step to your workflow and turn on the Trigger via the ON/OFF switch.
Next, generate an HTTP request to the unique URL as found in the Trigger configuration. Pay attention to the following:
- The right request method is used by the external server/app (GET or POST)
- The (JSON) payload has the expected structure
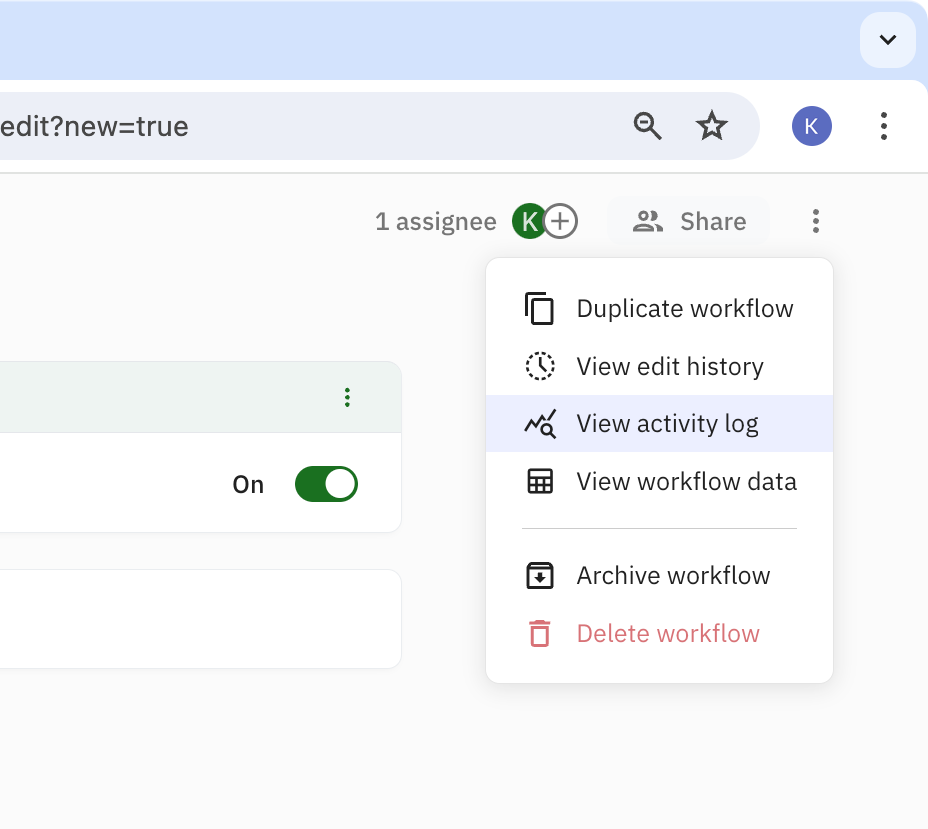
The activity log provides more diagnostic information in case you need to debug why your workflow isn't triggering as expected. It's accessible via the workflow's [...] overflow menu.